Have you ever come across a situation where you wanted your chatbot to use a tool and then answer? Sounds complicated, right! But now, MCP (Model Context Protocol) offers you a way to integrate your LLM to external tools easily and the LLM will be able to use those tools in every way. In this tutorial, we will dive into the process of converting a simple web app made using FastAPI, powered by an MCP Server, using the FastAPI-MCP.
FastAPI with MCP
FastAPI is a very simple tool built in Python which helps you to build web applications using APIs. It is designed to be easy to use as well as fast at the same time. Think of FastAPI as a smart waiter who takes your order (HTTP requests), goes to the Kitchen (Database/Server) and then takes your order (Output) and then shows it to you. It’s a great tool for building Web backends, Services for Mobile apps etc.
MCP is an open standard protocol by Anthropic that provides a functionality for the LLMs to communicate with external data sources and tools. Think of MCP as a toolkit that provides the right tool for the given task. We’d be using MCP for creating a server.
Now, what if these functionalities are given to your LLM? It will make your life much easier! That’s why FastAPI to MCP integration helps a lot. FastAPI takes care of the services from different sources and MCP takes care of the context of your LLM. By using FastAPI with MCP server, we can get access to every tool deployed over the web and utilize that as a LLM tool and make the LLMs do our work more efficiently.
In the above image, we can see that there is an MCP server that is connected to an API endpoint. This API endpoint can be a FastAPI endpoint or any other third party API service available on the internet.
What is FastAPI-MCP?
FastAPI-MCP is a tool which lets you convert any FastAPI application into some tool that LLMs like ChatGPT or Claude can understand and use easily. By using FastAPI-MCP you can wrap your FastAPI endpoints in such a way that they will become a plug and play tool in an AI ecosystem utilizing LLMs.
If you want to know how to work with MCP, read this article on How to Use MCP?
What APIs Can Be Converted into MCP Using FastAPI-MCP?
With FastAPI-MCP, any FastAPI endpoint can be converted into a MCP tool for LLMs. These endpoints should include:
- GET endpoints: Converted into MCP resources.
- POST, PUT, DELETE endpoints: Converted into MCP tools.
- Custom utility functions: Can be added as additional MCP tools
FastAPI-MCP is a very easy-to-use library that automatically discovers and converts these endpoints into MCP. It also preserves the schema as well as the documentation of these APIs.
Hands-on using FastAPI-MCP
Let’s look at a simple example on how to convert a FastAPI endpoint into a MCP server. Firstly, we will create a FastAPI endpoint and then move towards converting it into a MCP server using fastapi-mcp.
Configuring FastAPI
1. Install the dependencies
Make your system compatible by installing the required dependencies.
pip install fastapi fastapi_mcp uvicorn mcp-proxy2. Import the required dependencies
Make a new file with the name ‘main.py’, then import the following dependencies inside it.
from fastapi import FastAPI, HTTPException, Query

import httpx

from fastapi_mcp import FastApiMCP
3. Define the FastAPI App
Let’s define a FastAPI app with the name “Weather Updates API”.
app = FastAPI(title="Weather Updates API")4. Defining the routes and functions
Now, we will define the routes for our app, which will denote which endpoint will execute which function. Here, we are making a weather update app using weather.gov API (free), which doesn’t require any API key. We just need to hit the https://api.weather.gov/points/{lat},{lon} with the right value of latitude and longitude.
We defined a get_weather function which will take a state name or code as an argument and then find the corresponding coordinates in the CITY_COORDINATES dictionary and then hit the base URL with those coordinates.
# Predefined latitude and longitude for major cities (for simplicity)
# In a production app, you could use a geocoding service like Nominatim or Google Geocoding API
CITY_COORDINATES = {
   "Los Angeles": {"lat": 34.0522, "lon": -118.2437},
   "San Francisco": {"lat": 37.7749, "lon": -122.4194},
   "San Diego": {"lat": 32.7157, "lon": -117.1611},
   "New York": {"lat": 40.7128, "lon": -74.0060},
   "Chicago": {"lat": 41.8781, "lon": -87.6298},
   # Add more cities as needed
}


@app.get("/weather")
async def get_weather(
   stateCode: str = Query(..., description="State code (e.g., 'CA' for California)"),
   city: str = Query(..., description="City name (e.g., 'Los Angeles')")
):
   """
   Retrieve today's weather from the National Weather Service API based on city and state
   """
   # Get coordinates (latitude, longitude) for the given city
   if city not in CITY_COORDINATES:
       raise HTTPException(
           status_code=404,
           detail=f"City '{city}' not found in predefined list. Please use another city."
       )

   coordinates = CITY_COORDINATES[city]
   lat, lon = coordinates["lat"], coordinates["lon"]

   # URL for the NWS API Gridpoints endpoint
   base_url = f"https://api.weather.gov/points/{lat},{lon}"

   try:
       async with httpx.AsyncClient() as client:
           # First, get the gridpoint information for the given location
           gridpoint_response = await client.get(base_url)
           gridpoint_response.raise_for_status()
           gridpoint_data = gridpoint_response.json()

           # Retrieve the forecast data using the gridpoint information
           forecast_url = gridpoint_data["properties"]["forecast"]
           forecast_response = await client.get(forecast_url)
           forecast_response.raise_for_status()
           forecast_data = forecast_response.json()


           # Returning today's forecast
           today_weather = forecast_data["properties"]["periods"][0]
           return {
               "city": city,
               "state": stateCode,
               "date": today_weather["startTime"],
               "temperature": today_weather["temperature"],
               "temperatureUnit": today_weather["temperatureUnit"],
               "forecast": today_weather["detailedForecast"],
           }

   except httpx.HTTPStatusError as e:
       raise HTTPException(
           status_code=e.response.status_code,
           detail=f"NWS API error: {e.response.text}"
       )
   except Exception as e:
       raise HTTPException(
           status_code=500,
           detail=f"Internal server error: {str(e)}"
       )
5. Set up MCP Server
Let’s convert this FastAPI app into MCP now using the fastapi-mcp library. This process is very simple, we just need to add a few lines of and the fastapi-mcp automatically converts the endpoints into MCP tools and detects its schema and documentation easily.
mcp = FastApiMCP(
   app,
   name="Weather Updates API",
   description="API for retrieving today's weather from weather.gov",
)
mcp.mount()
6. Starting the app
Now, add the following at the end of your Python file.
if __name__ == "__main__":
   import uvicorn
   uvicorn.run(app, host="0.0.0.0", port=8000)
And go to terminal and run the main.py file.
python main.py Now your FastAPI app should start in localhost successfully.
Configuring Cursor
Let’s configure the Cursor IDE for testing our MCP server.
- Download Cursor from here https://www.cursor.com/downloads.
- Install it, sign up and get to the home screen.

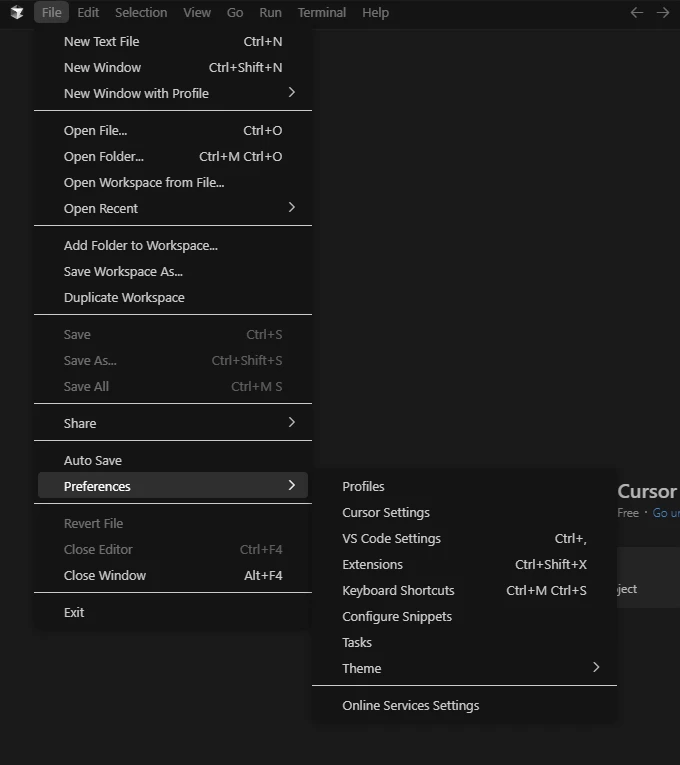
- Now go to the File from the header toolbar. and click on Preferences and then on Cursor Settings.
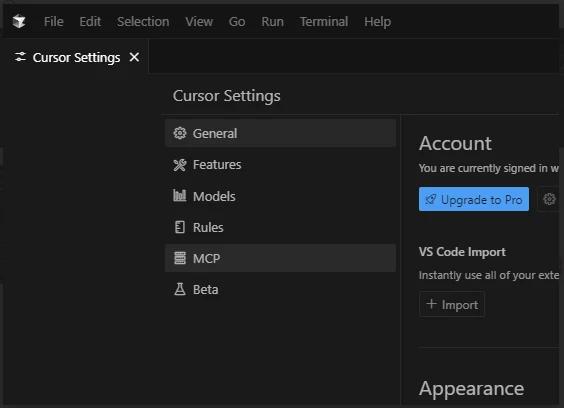
- From the cursor settings, click on MCP.
- On the MCP tab, click on Add new global MCP Server.
It will open a mcp.json file. Paste the following code into it and save the file.
{
   "mcpServers": {
     "National Park Service": {
         "command": "mcp-proxy",
         "args": ["http://127.0.0.1:8000/mcp"]
     }
   }
}- Back at the Cursor Settings, you should see the following:

If you are seeing this on your screen, that means your server is running successfully and connected to the Cursor IDE. If it’s showing some errors, try using the restart button in the right corner.
We have successfully set up the MCP server in the Cursor IDE. Now, let’s test the server.
Testing the MCP Server
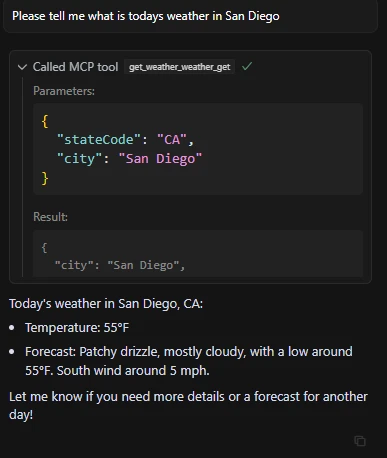
Our MCP server can retrieve the weather updates. We just have to ask the Cursor IDE for the weather update on any location, and it will fetch that for us using the MCP server.
Query: “Please tell me what is today’s weather in San Diego”
Query: “New York weather?”

We can see from the outputs that our MCP server is working well. We just need to ask for the weather details, it will decide on its own whether to use MCP server or not. In the second output we asked vaguely “New York weather?” it was able to realize the context of the query based on our previous prompt, and used the appropriate MCP tools to answer.
Conclusion
MCP allows LLMs to increase their answering capabilities by giving access to external tools and FastAPI offers an easy way to do that. In this comprehensive guide, we combined both the technologies using the fastapi-mcp library. Utilizing this library, we can convert any API into MCP server, which will help the LLMs and AI agents to get the latest information from the APIs. There will be no need to define a custom tool for every new task. MCP with FastAPI will take care of everything automatically. The revolution in the LLMs was brought by the introduction of MCP, and now, FastAPI paired with MCP is revolutionizing the way LLMs are accessing these tools.
![]()
Harsh Mishra is an AI/ML Engineer who spends more time talking to Large Language Models than actual humans. Passionate about GenAI, NLP, and making machines smarter (so they don’t replace him just yet). When not optimizing models, he’s probably optimizing his coffee intake. 🚀☕
Login to continue reading and enjoy expert-curated content.